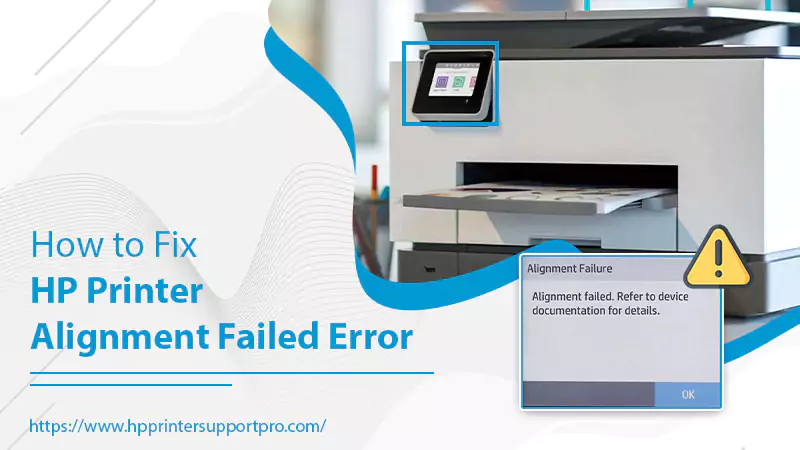
HP printers often display an ‘Alignment failed’ error message. It means that the printing device cannot get ink from the cartridges optimally. Cartridges that are not genuine can sometimes lead to this issue. Besides, unclean printheads, low ink levels, and malfunctioning cartridges or printheads also cause HP printer alignment failed error messages.
But there are various techniques to resolve the issue. For example, you can perform an alignment to clear the error, reset the printer, replace empty cartridges, and clean the printheads. Read on to learn about these techniques in detail.
Troubleshooting for the HP Printer Alignment Failed Error
HP Inkjet, Laser, and Photosmart printer models encounter the ‘Alignment failed’ message. Use these resolutions to rectify the problem.
1. Restart your HP printer.
Restarting the printer acts as a simple reset of the device. It facilitates the machine to realign properly. Many people have found the alignment problem resolved after restarting the printer.
Just power off the printing device. Now turn it back on after a few seconds. If there’s a whirring sound when the printer restarts, it means that the device is trying to align the cartridges.
Move to the next fix if the alignment error still persists.
2. Align the printer correctly.
Aligning the printheads is a good way to fix the cartridge alignment failed HP printer error. Here are points to use when aligning the printhead.
- Stack the tray with printer paper.
- Now adjust the width guides of the paper and print an alignment page.
- If you have an HP printer with a touchscreen, access the ‘Printer Maintenance’ menu. Now choose the ‘Align cartridges’ option.
- If you have the HP Smart app, tap your printer on this app and click ‘Print Quality Tools.’ Now, choose the ‘Align the printhead’ option.
- Windows users with the HP Printer Assistant should tap ‘Maintain your printer.’ Now, choose the ‘Align the printheads’ option.
- If you have an HP printer with a scanner, use the instructions on the alignment page to scan it and finish the alignment.
3. Reset your HP printer.
You can reset the printer either by unplugging the power cord from its source or by using the LCD control panel. A reset will also fix the cartridge alignment failed HP printer error.
-
Reset the printer by unplugging its cord.
- Remove the rechargeable battery from the printer if it has it.
- Disconnect the power cord from your HP printer.
- The printer should be turned on.
- Hold back for around a minute.
- Now, reconnect the cord to the wall outlet as well as your HP printer.
- Switch on the printer and check if the alignment error is there.
-
Reset the HP printer through the LCD control panel
- On the printer’s control panel, hit the ‘Menu’ button.
- Go to the ‘Network Settings’ menu through the arrow buttons.
- Hit ‘OK’ after that.
- Now, using the arrow buttons, go to the ‘Reset Network Settings’ option.
- Press ‘OK.’
- On the message that asks if you desire to reset the network settings, tap ‘Yes.’
- The printer reset process will get completed.
4. Use genuine HP ink cartridges
The HP printer alignment failed problem will creep in if you rely on third-party cartridges for your printer. Use original ink cartridges from the original HP website. They must be compatible with your printer model.
Check if you are using authentic HP printer ink cartridges by looking for a QR code on the toner cartridge box of the printer. Scan this code to assess the originality of the cartridge. Head over to the HP Anti-counterfeit to learn more about cartridges.
5. Find and replace empty cartridges.
If you are still wondering how to fix alignment on HP, the problem may be in your ink cartridges. Low ink levels in cartridges cause various errors, including alignment errors.
First, determine the ink levels and then replace the cartridges.
- Users of HP printers with touchscreen should search for the icon of the cartridge, an ink drop, or an Ink Level menu.
- HP Smart app users can see the ink levels display on the app’s Home screen.
- You can also check the ink levels by opening the printer software and tapping the ‘Ink Levels’ option.
- If you have an HP Deskjet GT printer model, look for the ink tank windows on your printer.
- After finding empty or low ink cartridges, replace or refill the ink tank.
6. Find and remove paper stuck inside the printer.
You may also find alignment failed on the HP printer if bits of paper is jammed in the device. These disturb the usual printer operation and also the alignment.
- Examine your printer’s exterior parts.
- Now examine the internal parts by opening the cover of your HP printer.
- If you find any bits of paper, remove them gently.
- If there is no paper, look for debris. Clean it from your device.
- After removing stuck paper and cleaning debris, put the parts you took back into place.
7. Schedule an automatic cleaning of the printhead.
You can auto-clean your printer’s printhead to resolve the alignment problem. hp printer printhead should be clean.
- Load the printer’s tray with clean white papers compatible with your printer model.
- Now, access your device’s control panel and hit ‘Setup.’
- In the Setup menu, choose ‘Tools.’
- Now click ‘Clean printhead.’
- Hit the ‘OK’ button.
- The printhead cleaning process will commence.
- After it completes, print a test page.
- The test page should not have any faded patterns.
- If the page doesn’t turn out as expected, perform the printhead auto-cleaning again.
- After that, print and examine the test page.
8. Align the printer after checking the paper type.
The paper type should be suitable for printing an alignment page. If it’s wrong, you will find this error message. Use these pointers to load the appropriate paper type and perform a printer alignment.
- Take away the paper from the tray.
- The paper you use must be plain U.S., clean, and unused.
- Do not use used paper, colored paper, or a photo.
- Next, perform the alignment process.
- Using the arrow keys, touch the ‘Setup’ icon.
- Next, touch ‘Tools’, followed by the down arrow and touching the Align printer’ option.
- When the printer produces an alignment page, open the lid.
- Place this page on the scanner glass correctly.
- Close the lid.
- Touch ‘OK.’
- After the alignment page scans, examine it for defects.
- The page should have black and cyan colors.
- If they are not there, there’s an issue with the ink system.
- Check the ink levels and replace empty cartridges.
Final Thoughts
Now, you won’t face any issues in resolving the HP printer alignment failed error. A simple reset, cleaning the printhead, and replacing depleted cartridges will help you troubleshoot the error. Ensure to use genuine HP cartridges if you face this problem repeatedly. For more details, contact an expert HP Printer Support team.